Pages

Friday, September 16, 2016

The Bioshock Remastered Edition is literally the worst bait and switch in gaming history (hyperbole).

     I was really excited for the Bioshock Remastered edition, until I played it... I cannot begin to fathom what the developers were thinking as they showered us with pretty trailers and screenshots of upgraded effects and fancy new textures. Sure some of the textures are better and the lighting is nicer in parts of the game, but what I want to focus on is the opening.

What you see in the main menu
What the game actually looks like

     The opening moments of a game are one of the most important parts to get right.  Bioshock had a fantastic opening and from what we saw in the trailers (and the main menu!) they did a fantastic job of updating it with shiny new particle effects, a more detailed lighthouse, and a brand new super spiffy water shader... Then you load up the game and you get this:

The Main Menu vs In Game lighting, water, and  particle effects

     What...

Tuesday, September 13, 2016

UE4 Sand WIP 2

My desert environment has come a long way since my last update. It is a little hard to see in the gif but I am working on improving the animated sand texture. I think I might take a break from the desert environment and start blocking out the jungle.


Thursday, August 25, 2016

UE4 Sand WIP

I decided to take a break from working on the Ocean shader to work on the sand VFX.

the ground texture still needs some work but everything else is starting to look the way I want.

Monday, August 22, 2016

UE4 Water WIP

I am working on an environment in Unreal Engine 4 and I have started making some progress on the water.


I am happy with the way it is turning out so far, However, There are two problems I am running into that are keeping me from progressing.

First, Unreal has some problems with the way it handles transparency so I am stuck with opaque water until I can find a good way to fix the transparency issues.

Second, I managed to get the waves to crest but I cannot seem to get them to crash back down in a convincing way. I have tried using a few different methods but non of them look the way I want it to.

Here is a bonus picture of my nightmare shader that I use to test new ideas.
And this is the cleaned up one...


Monday, June 20, 2016

Grass!

The last two months have been really busy between traveling to California for my brothers wedding and work.  It will take some time before I can post any regular updates since I have a lot of pictures and video to sort through. in the mean time here is a work in progress gif of a grassy scene I started working on.

Wednesday, April 27, 2016

Dark Souls x Limbo

I have been playing a lot of Dark Souls and last night I decided to make a Dark Souls inspired environment in a Limbo art style using Unreal Engine 4.


Tuesday, April 19, 2016

Tuesday, March 8, 2016

Process Gif 3

As progress continues on my environment, based on the San Juan Bautista Mission down in California, I am at the point where I need to start thinking about the exterior. With this in mind I decided to do another look and feel speed painting for the area outside of the Mission. 

With this painting I started with a quick sketch before blocking in some value. with the value blocked in I decided to try a new process. 

I copied and pasted 3 layers of the painting and color corrected them to be Red Blue and Green. then using a layer mask I blended the layers together. 

Once that was finished I went through some of the Photoshop filters( mainly Cutout and Palette Knife) to simplify the color and remove some of the sketchy marks. 

Finally I added a layer on top and painted over any rough areas and added a few corrections to the color.

I found this method helpful for creating quick color scripts and speedpaintings. It is a great way to quickly take a sketch through to value and color, but this process requires more work to create what I would consider a "finished" painting.


Progress Update on the environment I have been creating in Unreal Engine 4.


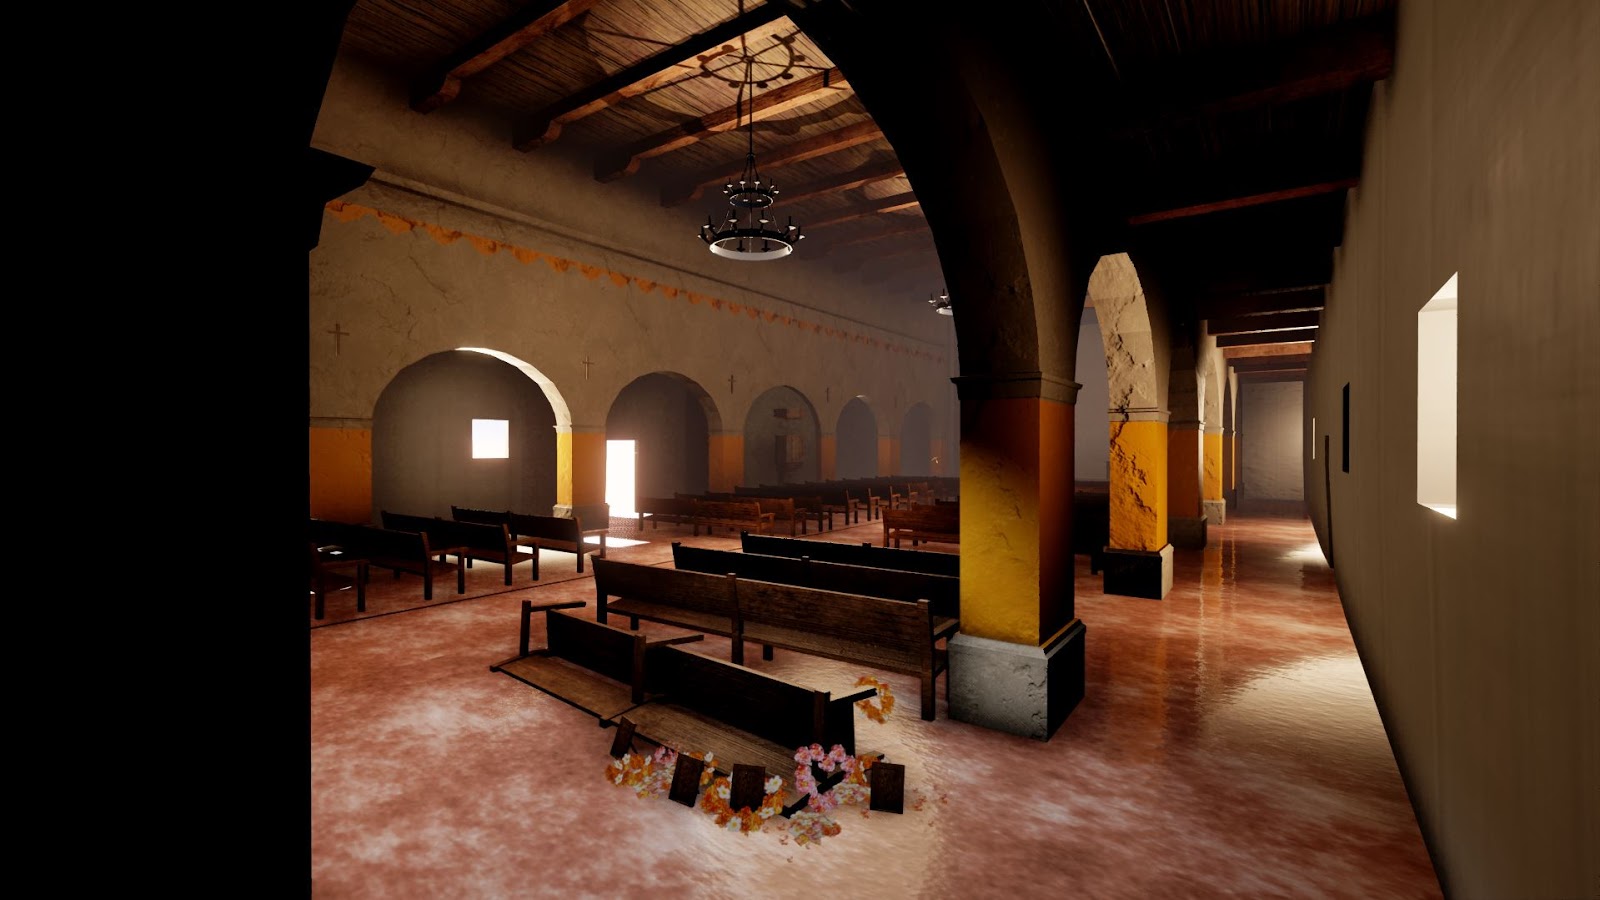
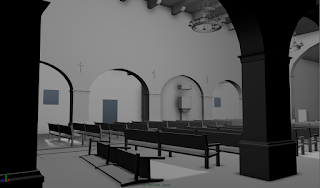
I started by roughing out the interior starting with basic primitives to block out the scene and get the proportions right.  Getting the proportion of the environment working was by far the hardest part of this process. On the one hand accidentally making the tiniest model slightly off scale could make the whole environment look wrong. On the other hand make a small object too small and the viewer will never see it.  Some of the things I had to make exaggerate the scale of include the crosses and the width of some of the ledges.
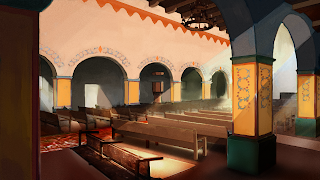
After I was mostly satisfied with the general scale and proportions of the environment I did a paint over to get the look and feel starting with rough color then adding texture. A more in depth look at my process can be found here

I then took and started blocking out the textures, starting with a quick tiling floor texture, and moving on to the arches. At this stage the textures are still lacking a lot of the painted details that you can see in the look and feel painting I did
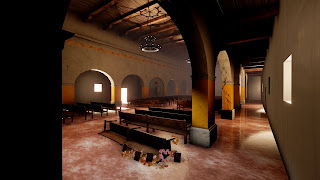
With the rough textures in place I started work on the lighting. I starting with atmospheric fog and a directional light then worked on the lightest and darkest areas of the scene before adding the "Hero" lighting to accent important parts of the scene

With a first pass on lighting in place I am now going through and removing low poly models and replacing a number of the placeholder textures starting with the floor. Below are some screenshots of the current state of the environment

I will write a more detailed post on my workflow for creating textures sometime soon


Monday, February 1, 2016

Process Gif 2

I am modeling an environment based on the San Juan Bautista Mission down in California and I decided to do a quick look and feel painting. I started by quickly blocking out the environment in maya and adding some spot lights. I then blocked in some rough color, went through my reference folder, and did some Photo bashing to get texture reference. lastly I added a layer on top and did a final paint over simplifying the texture and color and cleaning things up a bit.


Wednesday, January 20, 2016

Process Gif 1

I am trying to get better at document my process as I experiment with different tools and ways of working in Photoshop.  to help with this I have decided to start doing gifs that step through the painting from start to finish. I have only created a few gifs so far but I am already learning a lot about my process and ways to streamline my workflow.

In this painting I started with a quick sketch and then blocked in the foreground, middle ground, and background on separate layers. once I had the separate layers blocked out I went back and forth between them adding texture and detail.


Tuesday, January 19, 2016

2-3 hour Environment Painting

I had Monday off so I painted an environment. I need to practice painting foliage more.

Friday, January 15, 2016

Environment Painting.

I'm trying to get better at uploading my work. Here is a painting I did last night.

Tuesday, November 17, 2015

Dance WIP

This is a WIP of a dance animation I am working on inspired by a scene from saturday night fever.

In class demo walk cycle for a HighSchool Animation Class I teach


Here is a work in progress walk cycle for a HighSchool Animation Class I teach.  In this class I cover the 12 principles of animation and teach students how to animate in Adobe Flash and Autodesk Maya.  I start students off with a ball bounce in Adobe Flash before Teaching Maya.

In Maya I have students do two ball bounce animations. One where the ball is bouncing in place, and another where the ball bounces down three steps.  The transition to animating in 3D can be challenging, I find that a ball bounce is the best way to get students comfortable with using Maya's interface.

After the Ball bounce I go into a walk cycle starting with the lower body.  By animating just the lower body students are challenged without getting overwhelmed.  I will upload a playblast of the finished lower body walk cycle before we move onto the upper body.

I find it helpful to teach from the hips out since almost every motion we do starts from the hips. For example in a walk cycle we shifting our weight forward starting at the hips and essentially through our feet out in front to catch ourselves. Being consistent in going back to the hips gives students a starting point and helps them learn how to trouble shoot their animations. If there is a problem with the ankle disconnecting from the foot, check the hips and work your way down to the feet. If the knee is popping, go to the Hips and see if that is what is causing it, then work your way down.

-James McWhirter IV

Saturday, August 22, 2015

Portrait worm up.

I have been trying to be more consistent and do daily worm ups. This is one from the other day

Sunday, February 8, 2015

WIP character

I started working on this character for a few hours last night.  I teach a modeling and animation class for high school students on the weekend and I wanted to have an example to show them. the goal is to document in detail a step by step process of how I model a character from start to finish.

Tuesday, January 20, 2015

Rig for Leet World Character

I started doing animation for Smooth Few Films and had to create a rig for the characters. since we are using Counter-Strike Source and Counter-Strike: Global Offensive models I have to use a decompiler which only gives me the bones and the mesh.  getting things in and out of the source engine proved challenging at first but luckily there is still a thriving modding community, as well as documentation from Valve, so the solution to every problem has been just a Google search away. I have some work to do and I am still learning the ins and outs of rigging a character but I am pleased with the results I have had so far.

Monday, December 15, 2014

Environment painting

I finally got around to finishing this painting, I learned a lot doing this piece

Sunday, December 14, 2014